 AquaStealth Polar Bear chiller http://www.aquastealth.com/13hpcoolchiller.aspx Danger Den Cylindrical Reservoir http://www.dangerdenstore.com/product.php?productid=55&cat=0&page=1 The pumps are Eheim 1250 Aquarium pumps you can get from your local aquarium supply stores. http://www.pondliner.com/PondmasterPumps.htm Custom built 6" PVC resivoir, apx. 4gal, with internal filtration system. 3/4" & 1" ID Tubing, brass fittings and shut-off valves from ACE Hardware. 3/4" Antellco BallValve. http://www.berryhilldrip.com/AntProduct2.htm Google or go to Amazon.com for "Elite Silicone Airline Tubing", ~3/16" ID coolant lines. 250ft spool far cheaper per foot than 10ft or 20ft lengths. |
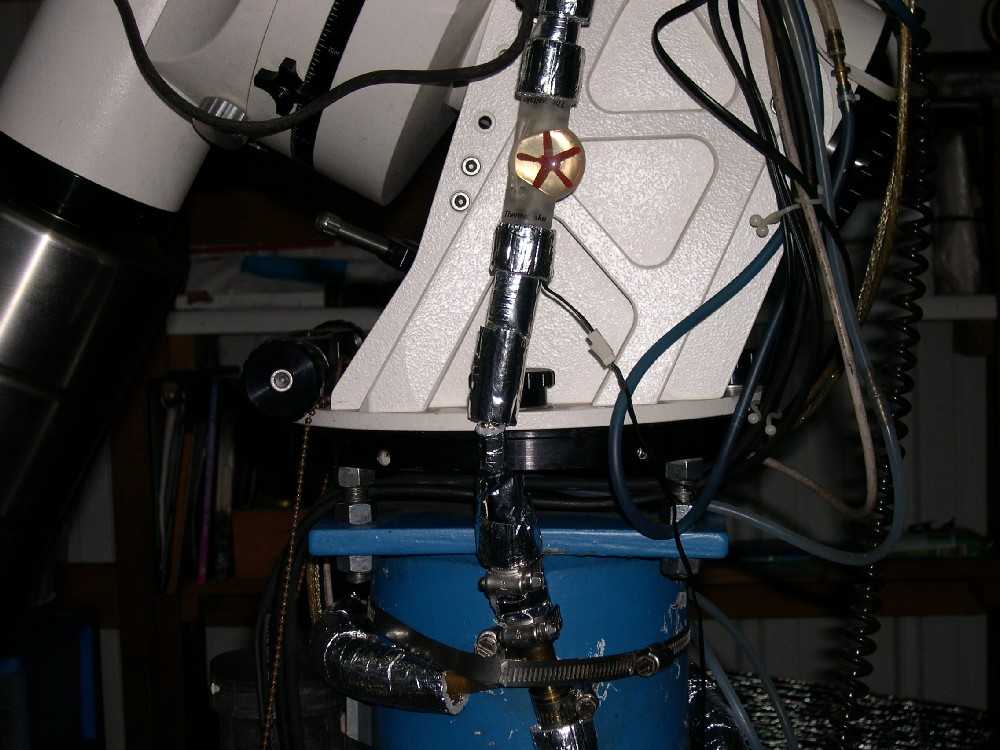 Cold water feed through "T" fitting. Main flow makes a 90deg turn, a positive pressure is created in the 3/16" ID line going to the CCD camera. |
 Return water from CCD camera through "T" fitting. Main flow passes straight through creating suction on the 3/16" ID return line form the CCD camera. |
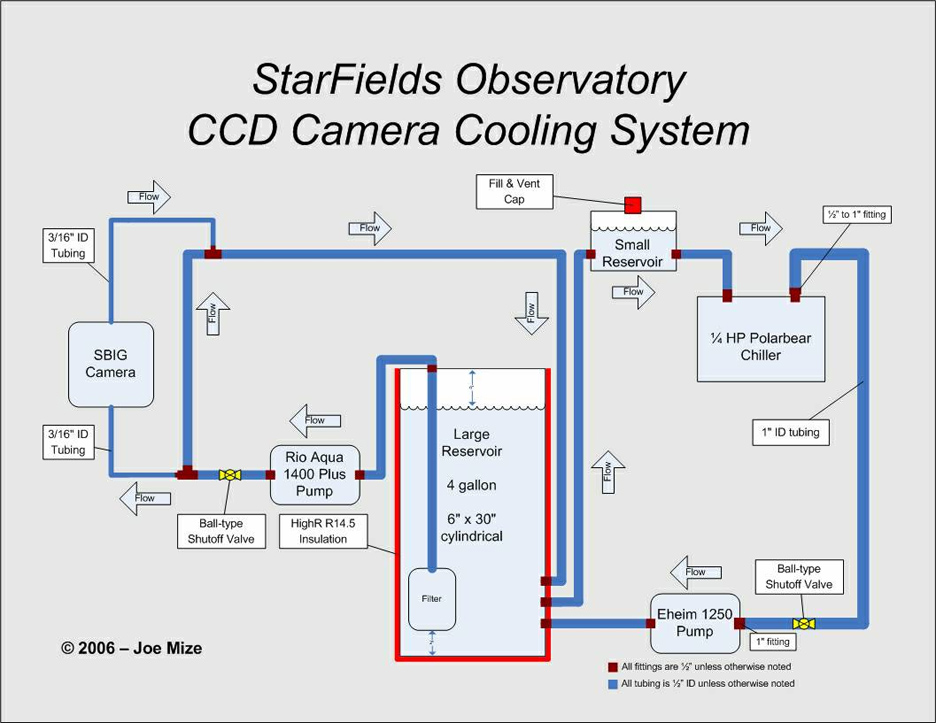 Cooling System Diagram courtesy of Jonathan Burnett. |
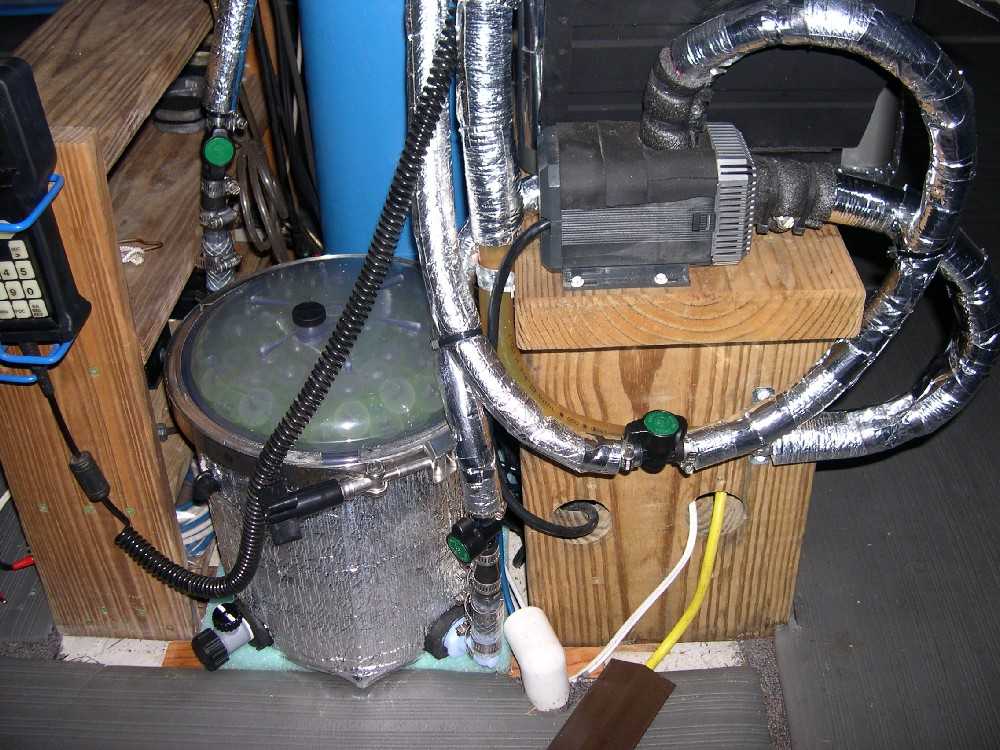
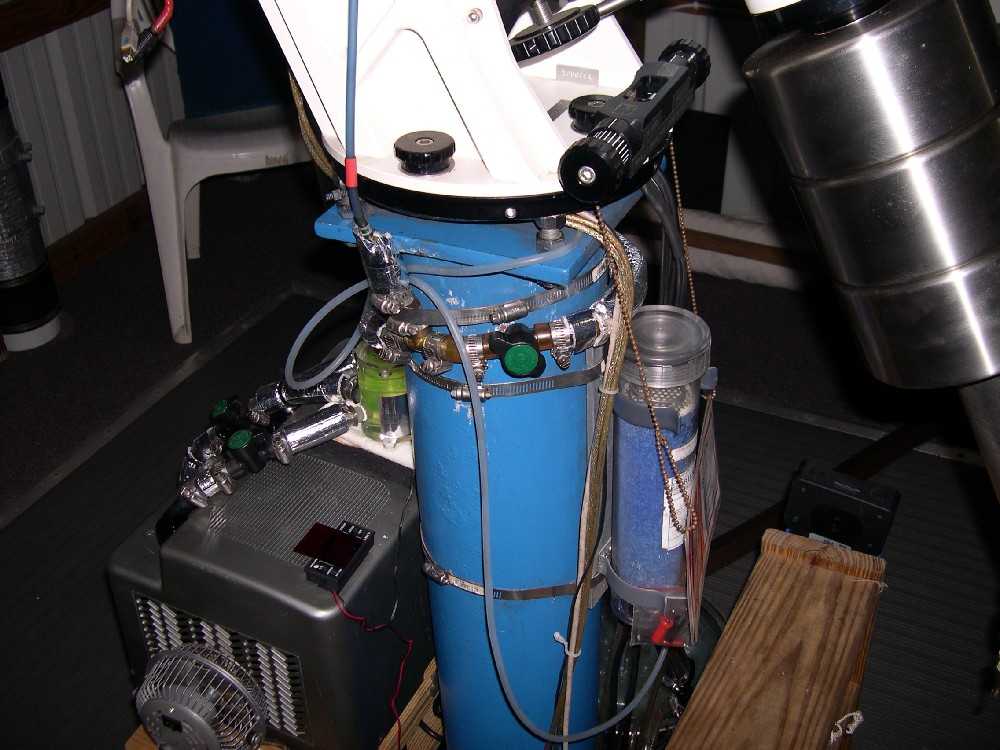
The following are portions of eMail correspondance with Jonathan Burnett about my water cooling system. Please excuse the disjointed information. :) Water Cooling. Hmmm? Just what and how much do you want to get into it? I just spent some more time on it the other day adding insulation to the cooling lines because the heat blowing on the coolant lines from the Chiller’s heat exchanger. The chiller has an Ultra Cool ‘cheater’ circuit which raises the sinced thermostat temp 10F, mine actually raises it 14F. This allows the Chiller, with its maximum low temp of 43F to actually go down to 29F. Now that being said, I’ve never gone below 50F. I do use the cheater circuit but I set the normal temp at 63F and when that is reached I throw the cheater switch. The temp is then reported as 77F and the chiller starts cooling down again. “If” you decide to go the rout of the AquaStealth PolarBear chiller I’d suggest you consider whether you need to go the extra expense of the cheater circuit. Just like your camera, cool down in steps and lower it to as low as you want to the 43F lowest point. With my setting of 49-50F I find my camera cooling power for –20C ranges from ~40% on cool Spring nights to ~76% on the hottest Summer in the mid-upper 70Fs. Otherwise the best I can get without the chiller is -10-15C at 80-85%, depending how hot it actually is. Your camera is smaller in size so you shouldn’t be as sensitive to outside ambient air warming the camera body. I also have an additional heater on my chip window to keep what I call “iced tea” effect, moisture inside the camera/filter area condensing on the ‘outside’ of the chip window. This additional heater uses 2-5% more power to cool the chip but I don’t have condensation any longer. One thing I didn’t put into the web page is I don’t use the SBIG Quick Disconnect plugs. The ID of the Quick Disconnect is about 1/16”, the camera nipple is 1/8”. IMHO the Quick Disconnect diameter is waaay too small for efficient flow and therefore cooling. I went to NAPA and bought a package of Ľ” fuel line spreadable spring clips. The silicone line pushes directly onto the camera, using a needle nose pliers to spread the clamp slip them up the tubing on to the connection. Plenty of holding power with 3/16” ID hose going into the 1/8” camera nipple even without the spring clips. Now, if you don’t want to get into ‘that’ much of a setup plenty of people are using a good submersible pump and a bucket of water. Put a bag of ice, or those re-usable blue ice packages into your reservoir but whatever you do put both INSIDE ANOTHER BAG to keep contaminants out of your water going into your camera. A neighbor used a small camper refrigerator with his reservoir bucket in there. He submersed copper tubing in the water in the bucket to cool the water used to cool the camera. You could get a little fancy here, get some copper tubing with fins for better heat transfer. However you go about it you should consider that the water MUST be clean, either filter it or use a closed system. Another thing to consider is the volume of water should be sufficient to maintain its cool temperature with the heat input from the camera. If you experience what I call the “black hole” in your image it’s probably moisture inside your camera condensing on the ‘outside’ of your chip window. This looks like a normal image with a huge roundish black hole in the center of the image. You can combat this by building a Dry air Purge system. I use it about 10-15mins each night before you start imaging. See http://www.cav-sfo.com/DryAirPurge.html No, both pumps are for are for water. I found, before I built my reservoir and using 1/8” hose I couldn’t raise the water to the camera, there wasn’t enough flow to cool the chip. I built the reservoir adding a pump there, changing to 1/2ID hose with only a short distance of 3/16”ID silicone hose. I have plenty of flow now. You should be able to do without the reservoir, although I’d recommend one. I tried the dew heater trick but didn’t like the additional heat on the camera, kinda defeated the idea of chilling the water. No, no schematic. Let me see if I can convey the process in words. Small clear reservoir feeds the chiller via suction from the chiller into the upper fitting on the chiller. The water is sucked through the chiller by the first pump from the lower fitting on the chiller. (There is no pump inside the chiller. The chiller requires 65Lpm flow to chill properly.) Out of the first pump into the new large reservoir. There’s an internal filter inside the tank on the input/suction side of the second pump. Out the second pump up to the other two pictures. After the second picture the main line goes back into the large reservoir. Because there is a suction from the first pump through the chiller back through the first small reservoir there is suction from the large reservoir into the small reservoir starting the entire recess over again. The feed line from the chiller to the Eheim is 1” ID thick walled plastic hose. All the rest of the lines are ˝” ID thick walled plastic hose except for the 3/16” silicone hose to/from the camera. There is a ball-type shut-off valve on the Eheim pump's output hose and another on the other pump’s output side. Other than that you’ve gotten the circuit all down pat. The Eheim pumps some 1250Lpm. The other pump (can’t remember the name, bought it through Dr’s Foster & Smith pet stores online) is a fountain pump, dry or submersible. It is cheaper than the Eheim but it can raise a water column higher than the Eheim can. The fountain pump pumps something like 950-1150Lpm. It costs about $15 less than the Eheim but I’ve already had to replace the impeller cover as I cracked a flange installing the hose. It also gets warmer than the Eheim which heats the water. You asked about the flow through the 3/16” silicone hose. I’ve never “officially” measured the flow rate. I can tell you the 1/8” RC Airplane silicone fuel line, when disconnected only shot water out an inch or so because of the narrow constriction of the ID. The 3/16”ID hose on the other hand shoots water out a good 8-10” if not more. If I had to estimate the flow rate I’d say at least 2-3qts p/mins which is plenty for cooling the camera. When I turn on the pumps with a custom built switchbox I built to power on/off both pumps at the same time I see air in the lines moving through the 3/16” lines at about 1ft p/3-4sec. The impellers churn the water at such a rate it breaks air out of the water. Later when the pumps aren’t running the air condenses out into little bubbles. Once the flow is re-established they’re dissolved back into the water. I’ve added a pint of Denatured Alcohol to keep the sudsing down which it does so some extent. I don’t want to add any more alcohol because I also use Water Wetter. Water Wetter is used by Import Tuners in radiators. Water Wetter makes better contact between water and metal surfaces therefore better heat transfer into the water and it also acts as an anti-freeze. Adding more alcohol might affect Water Wetter’s performance Couple things. 1) Add a red little cap between the lines in the Little Reservoir, it’s used for top-off of the fluid levels. (FYI, the overall water level is apx 6” from the top of the Large Reservoir, no need to indicate this in your drawing, this just thought you’d be interested.) 2) The Large Reservoir is 6”ID PVC with rubber connection sleeves connecting the top/bottom square topped caps. All told there are 3 pieces of PVC in the middle section then the two end pieces connected to the center section with the rubber connection sleeves. (Total cost about $60 because of the PVC diameter and rubber connecting selves, then add the brass connections and s/s hose clamps inside and out. I used Marine-Tech Epoxy around all brass fittings, great stuff – it can even be applied under water and is gas and oil-proof.) a. The filter in the Large Reservoir is about 2” from the bottom of the tank, b. The input line from the Eheim pump crosses over and points downward along the opposite wall. This is to keep down the natural circulation swirl inside the tank at a minimum. (I could actually hear the sucking sound of the vortex before doing this.) c. The output line from the camera ˝” line does not go to the Small Reservoir, it goes directly to the Large Reservoir. This keeps sudsing to a minimum because the bubbles go into the tank rather than directly back into the chiller and pump impeller. d. The Input to the Small Reservoir comes directly from the Large Reservoir. This eliminates any possible back pressure to the Eheim pump trying to draw large quantities from a ˝” line. (In actuality there is a higher flow rate through the chiller, into the Large Reservoir and back into the Small Reservoir and Chiller than there is from the Large Reservoir through the Camera and back into the Large Reservoir.) The Large Reservoir is 30” tall, 6”ID. I just spent the last 30mins searching the house for documentation on the pump on top of the Large Reservoir without success. I went to Drs Foster and Smith web site, http://www.drsfostersmith.com/ to see if I could find it. Apparently they don’t carry it any longer but others do if you do a Search on “pumps”. Look for the “Head” value which represents the pumps ability to lift a column of water. Their Rio Aqua looks like a winner with a Max Head between 2-10ft. I believe I choose a 6-7ft pump costing about $30. http://www.drsfostersmith.com/product/prod_display.cfm?pcatid=4671&Ntt=pumps&Ntk=All&Ntx=mode+matchallpartial&Np=1&pc=1&N=0&Nty=1 You can find the pump I bought by Googleing “E160713”. It’s a Mag-Drive water pump, 350gph. They list between $9-$30.
I hope you find this information helpful planning your water cooling system...joe :) |
 SFO Home |